Installation
Download the corresponding file for your platform matching REAPER's architecture (not to be confused with the architecture of your operating system).
Follow these steps to install ReaPack:
- From REAPER: Options > Show REAPER resource path in explorer/finder
- Put the downloaded file in the UserPlugins subdirectory
- Restart REAPER. Done!
Note: Users of macOS Catalina or newer may need to click on "Allow Anyway" in System Preferences > Security & Privacy after launching REAPER once for ReaPack to load when installed for the first time.
Getting started
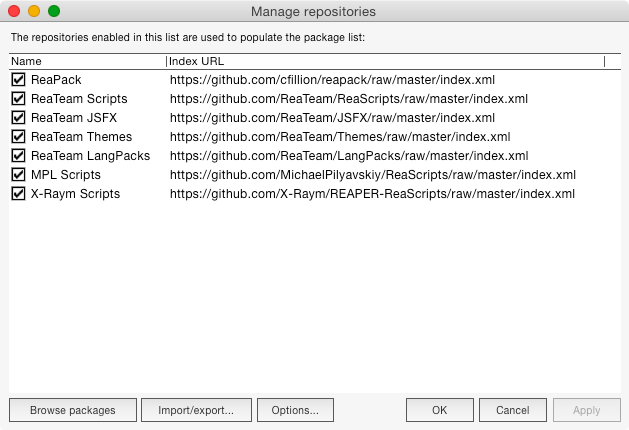
Upon first launch you are presented with the configuration dialog (Extensions > ReaPack > Manage repositories). Each repository in the list contains a different set of packages. More can be added using the Import button (see Import a repository).
There are two primary ways to install the resources included in the enabled repositories:
- Click on Browse packages and pick packages to install. See the Browse packages section of this guide.
- To install everything in bulk instead, click on Option and enable Install new packages when synchronizing. The installation will begin after clicking on OK or Apply.
Note: The ReaPack submenu may be missing from your Extensions menu if the menu was previously customized. Use REAPER's Customize menus/toolbar dialog to manually add ReaPack's submenu if necessary.
All ReaPack features can also be accessed from the Action List.
Synchronize packages
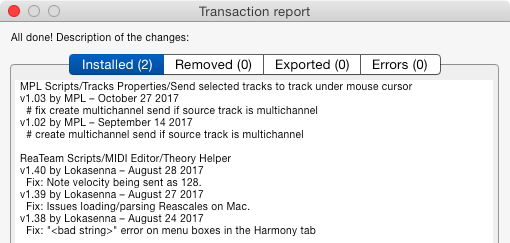
Run Extensions > ReaPack > Synchronize packages regularly to refresh the enabled repositories and automatically update every installed package (including ReaPack itself) to the latest stable version. This feature can be configured to install new packages and pre-releases as well (see Configuration).
Alternatively, you can manually select which packages to update (or select a specific version) using the package browser. See Browse packages.
Browse packages
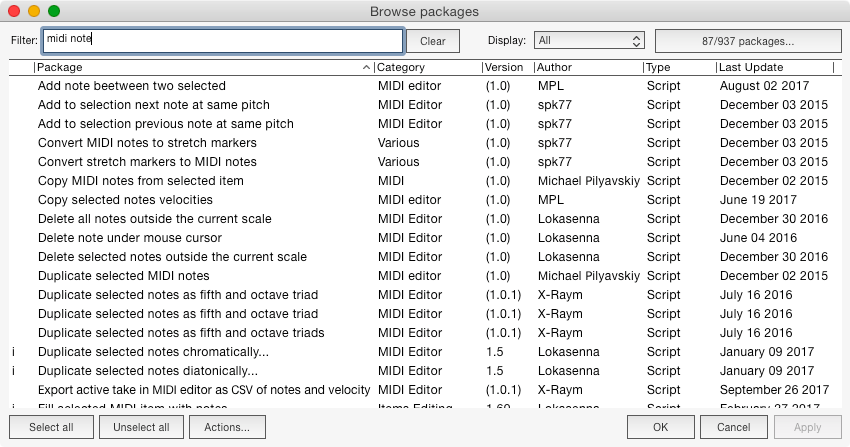
This section covers how to install and manage packages using the package browser (Extensions > ReaPack > Browse packages).
The first column at the left displays the package status:
| Row 1 | Meaning | Row 2+ | Meaning |
|---|---|---|---|
| Empty | Package is uninstalled | Empty | No queued actions |
| i | Package is installed | I | Queued for installation |
| u | An update is available | R | Queued for uninstallation |
| o | Package is obsolete | P | Pin status modified |
| p | Package is pinned |
The version column shows both the current installed version and the latest version available in the repository between parenthesis.
The columns can be customized. Right click on the column header to select which columns are shown. Left drag with the mouse to move or resize the columns.
Actions
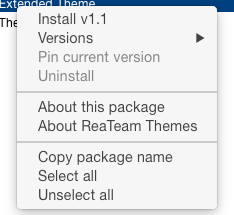
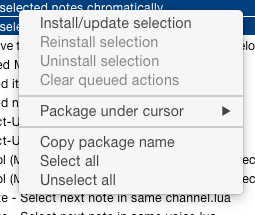
Right click on a package or a selection of packages to get a menu of available actions.
Per-package
These per-packages actions are checkboxes that can be toggled:
- Install <version>
- Update to <version>
- Download and install the latest version of the package. Only stable versions are selected unless the setting Enable pre-releases globally is enabled in Options or the version currently installed is already a pre-release.
- Reinstall <version>
- Reinstall the version currently installed
- Versions…
- Select a specific version of the package to install (including pre-releases)
- Pin current version
- Prevent this package from being automatically updated or detected as obsolete when synchronizing
- Uninstall
- Remove the package from your computer (settings and other files created by the package itself may be kept)
Selection-wide
The selection-wide actions are shown only when more than one package are selected. Unlike per-package actions these don't act as toggles. Use Clear queued actions to cancel all unapplied changes on every selected package.
Filtering
Search in the list by typing words in the filter box. ReaPack's filtering algorithm behaves similarly to the Action List. Put quotes around words to get exact matches: "midi editor" "note". Use ^ and $ to match the start and end of a column's text. Words can be grouped with parenthesis: ( midi note ) OR utility. Add NOT before a word or a group to invert the search. Use OR between words/groups to match one or the other.
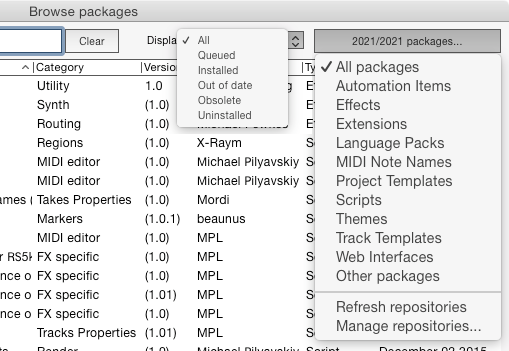
The big button at the top right shows how many packages are currently displayed and how many are available in total. Click on it to select which type of packages to show in the browser.
Configuration
This section covers ReaPack's configuration dialog (Extensions > ReaPack > Manage repositories).
Manage repositories
Right click on any repository in the list to open the following menu:
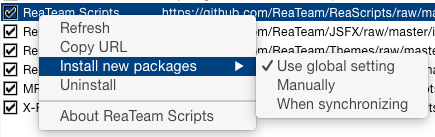
- Refresh
- Update the package list and metadata from this repository
- Install new packages…
- Override Install new packages when synchronizing for this repository only (see Options)
- Copy URL
- Put the index URL in the clipboard
- Uninstall
- Completely remove this repository including all installed packages it contains
- About <repository>
- Open the repository's documentation
Import repositories
Click on Import/export > Import repositories in Manage repositories or use the shortcut Extensions > ReaPack > Import repositories to add third-party repositories to ReaPack. You can find popular repositories in the Repository list.
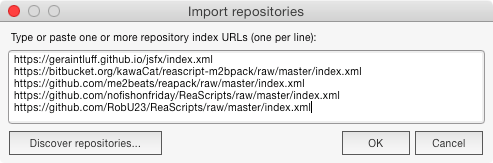
The URL to put in this dialog should have been given to you by the owner of the repository you wish to import. The golden rule of computer security applies to ReaPack repositories as well: don't install packages from untrusted sources.
Offline use
ReaPack requires an internet connection by design. However, it is possible to transfer data and installed packages to another computer using Export offline archive and Import offline archive in Manage repositories > Import/export.
For optimal results both computers should run the same operating system and software architecture. Some packages may provide different files depending on the system and architecture. Also note that obsolete packages cannot be imported.
Offline users should disable the setting Refresh index cache when older than a week in Manage repositories > Options > Network settings to avoid getting download failures when using the package browser and other features which would otherwise attempt to connect to the internet.
Options
Click on Options to get this menu:
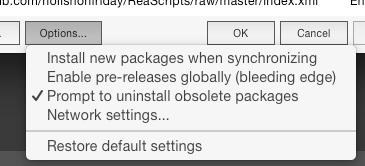
- Install new packages when synchronizing
- Enable to make Synchronize packages install every package in the enabled repositories in addition to installing updates. This setting can also be set on a per-repository basis (see Manage repositories).
- Enable pre-releases globally (bleeding edge)
- Use this mode to enable updating from a stable version to a pre-release when synchronizing or when updating from the browser. Pre-releases can always be manually installed from the package browser even if this setting is disabled.
- Prompt to uninstall obsolete packages
- Enable to detect obsolete packages when synchronizing and ask whether to keep or remove them. A package is obsolete when it was removed from its parent repository and is no longer available for download.
- Network settings
- Use this to configure how ReaPack connects to the internet (eg. to set a proxy server).
- Restore default settings
- Reset options to the factory defaults and restore altered or removed default repositories.
Support
You are welcome to ask any ReaPack-related questions in the ReaPack thread on the Cockos REAPER forum. Development or technical questions can be asked in the development thread.
Bug reports and feature requests can be filled in the issue tracker on Codeberg.